How to create rounded corners in Unity UI

Everyone knows that Unity is a great engine to get started with the game development. While many praise it’s 2D and 3D features, I myself love Unity UI (GUI) system. It allows you to create a modern user interface that is scalable to various screen sizes and resolutions.
Creating visually appealing user interfaces is crucial for providing an engaging user experience. One common design element is rounded corners, which can add a touch of elegance and modernity to your UI elements. While Unity's UI system does not natively support rounded corners, we can achieve this effect by utilizing sprite splitting. In this tutorial, we will guide you through the process of adding rounded corners to your Unity UI elements using sprite splitting.
Prepare image
First, we need to prepare the image that will be used to create rounded corners in your UI rectangles. Please open your graphic editor of choice (Photoshop, Gimp, Figma, etc.) and:
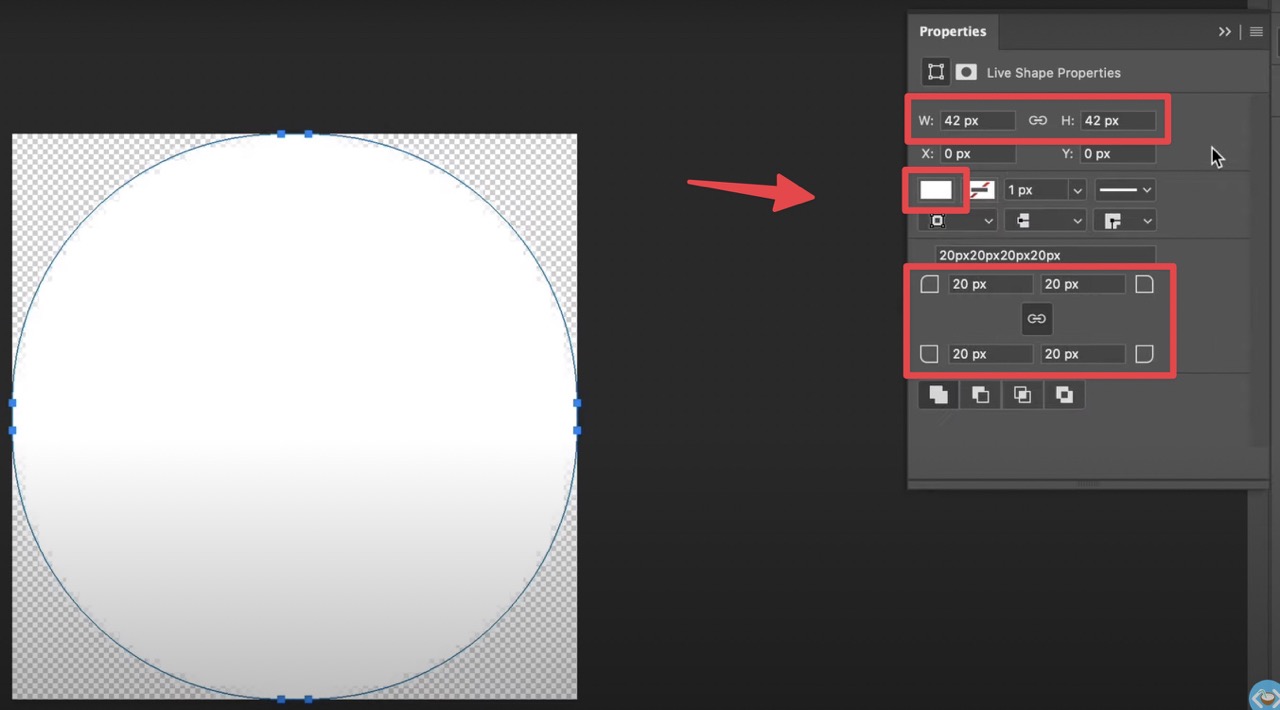
- create a new rectangle image with a size of
42x42 px. - Using rounded rectangle tool (or just rectangle tool), create an image that will cover the whole space of the image.
- Se the corner radius of the created rectangle to
20pxfor each corner. - Make sure that the rectangle is filled with a white color (that way it will be easier to color it in Unity later on)
- Save your image as a
.pngfile in your Unity project assets.
Great! It would be a great idea to prepare a few images like this for a different “roundness” to make sure that your rounded rectangles in Unity will look sharp.
If you don’t have a graphics skills, you can download for free my package with multiple pre-made graphics like this:

Configure image slicing (Sprite editor)
After images import, we need to properly slice them. By slicing the image, we define which parts can be resized (in the example below, all the ones that are in the middle: 2,4,5,6,8) and which parts need to be fixed, so that they will always appear rounded (1, 3, 7, 9).
To do so, in Unity:
- Select image in the
/Assetsfolder - Make sure that the texture type is set to Sprite (2D and UI)
- Click Sprite Editor
- In Sprite editor use a small window in the bottom right hand corner and fill out all border values with the value
20px. You should see a green guide lines that form a similar share as in the screenshot above. - Click Apply to save changes and close this window.
🥥If you're getting an error while trying to open Sprite Editor, make sure that you have a "2D Sprite" package installed (in the Package manager).
Applying the sliced image to the UI component
Once you have your sliced images prepared, we can apply one of it to the rectangle on your Unity scene!
- Create a new UI component in the scene hierarchy (as a Canvas child).
- Make sure that is has an Image component attached.
- In the image component select one of the defined image files (e.g.
Rounded42.png) - Change Image type to “Sliced”
An that’s it! If you’d like to see this tutorial in a video form, check out the video below:
